Kitchen Makeover 101: Cabinets
The moment we stepped into our house, I knew I wanted to renovate the kitchen. It was small and everything was dark, making it look even tinier. My husband, Eli, always insisted that the kitchen was low on the priority list, but Covid-19 and quarantine brought extra time to make my kitchen dreams come true. The first thing I tackled was the cabinets.
The Cabinets: Prep
Going in, I knew that I really wanted white cabinets, but this was a budget makeover so buying brand new ones was out of the question. I decided that painting them was the best option. I did quite a bit of research and decided exactly what I wanted ahead of making my purchases. I chose Nuvo’s Cabinet Paint Kit over Rust-Oleum’s similar kit, simply because Nuvo had better reviews and more How-To information available. As far as our hardware, I chose simple black knobs that matched the rest of the handles in our house and were cost-effective.
Here is what I used:
Sandpaper
Nuvo Cabinet Paint Kit in Titanium Infusion
Painters Tape
Paint Pan
Step One: Clean and Sand

This is what our cabinets looked like after I cleaned and lightly sanded them. The idea was to take off any grease and get rid of their natural shine so the paint would stick.
I probably went a bit overboard with this step, but I felt like our cabinets hadn’t had a good cleaning since we moved in — about a year and a half ago — so they were due for a good scrub. Before I began I removed all of the hardware and put it in a Ziplock baggy. I started out using a citrus degreaser to get all of the grease build-up off of the cabinets. From what I read, this is the most important step to ensure the paint will stick to the cabinets properly. Then I went through and lightly sanded both the inside and outside. I cleaned them once more with a diluted mixture of degreaser and water. And finally, I cleaned them with Windex because I read that it is really good prep for paint.
Step Two: Prime and Paint
The Nuvo kit we used claims it’s enough to cover 100 square feet of cabinets with two coats of paint — no primer necessary. We have well under 100 square feet of cabinetry but I opted to do a primer anyway. First I used painters tape to protect the edges where our cabinets met our floors, walls and appliances. Then I removed all of the cabinet doors and took them upstairs to our (unfinished) guest room where I arranged them on top of a large plastic sheet. This kit advertises that you can keep the doors on for painting, but again I opted to be safe rather than sorry. I started with the Behr Kitchen Primer and used it to coat the cabinets and the fronts of the doors. The cabinets looked less than stellar at this stage and I’m pretty sure my husband was questioning my sanity. I left it to dry overnight and woke up bright and early to flip the doors and put a coat of primer on the backside.

At this stage it was really hard to tell how it was going to come together.
On day two, after painting the backs of the doors I began to paint the cabinets with the Nuvo paint. My biggest fear was that because I was using a paint brush and a roller, the paint would appear streaky and look bad. It certainly looks streaky going on, but the paint levels itself out as it dries. I ended up doing three coats of paint on the cabinets and the fronts of the doors, and two coats on the backs of the doors over two days — being sure to let the paint dry completely between coats.
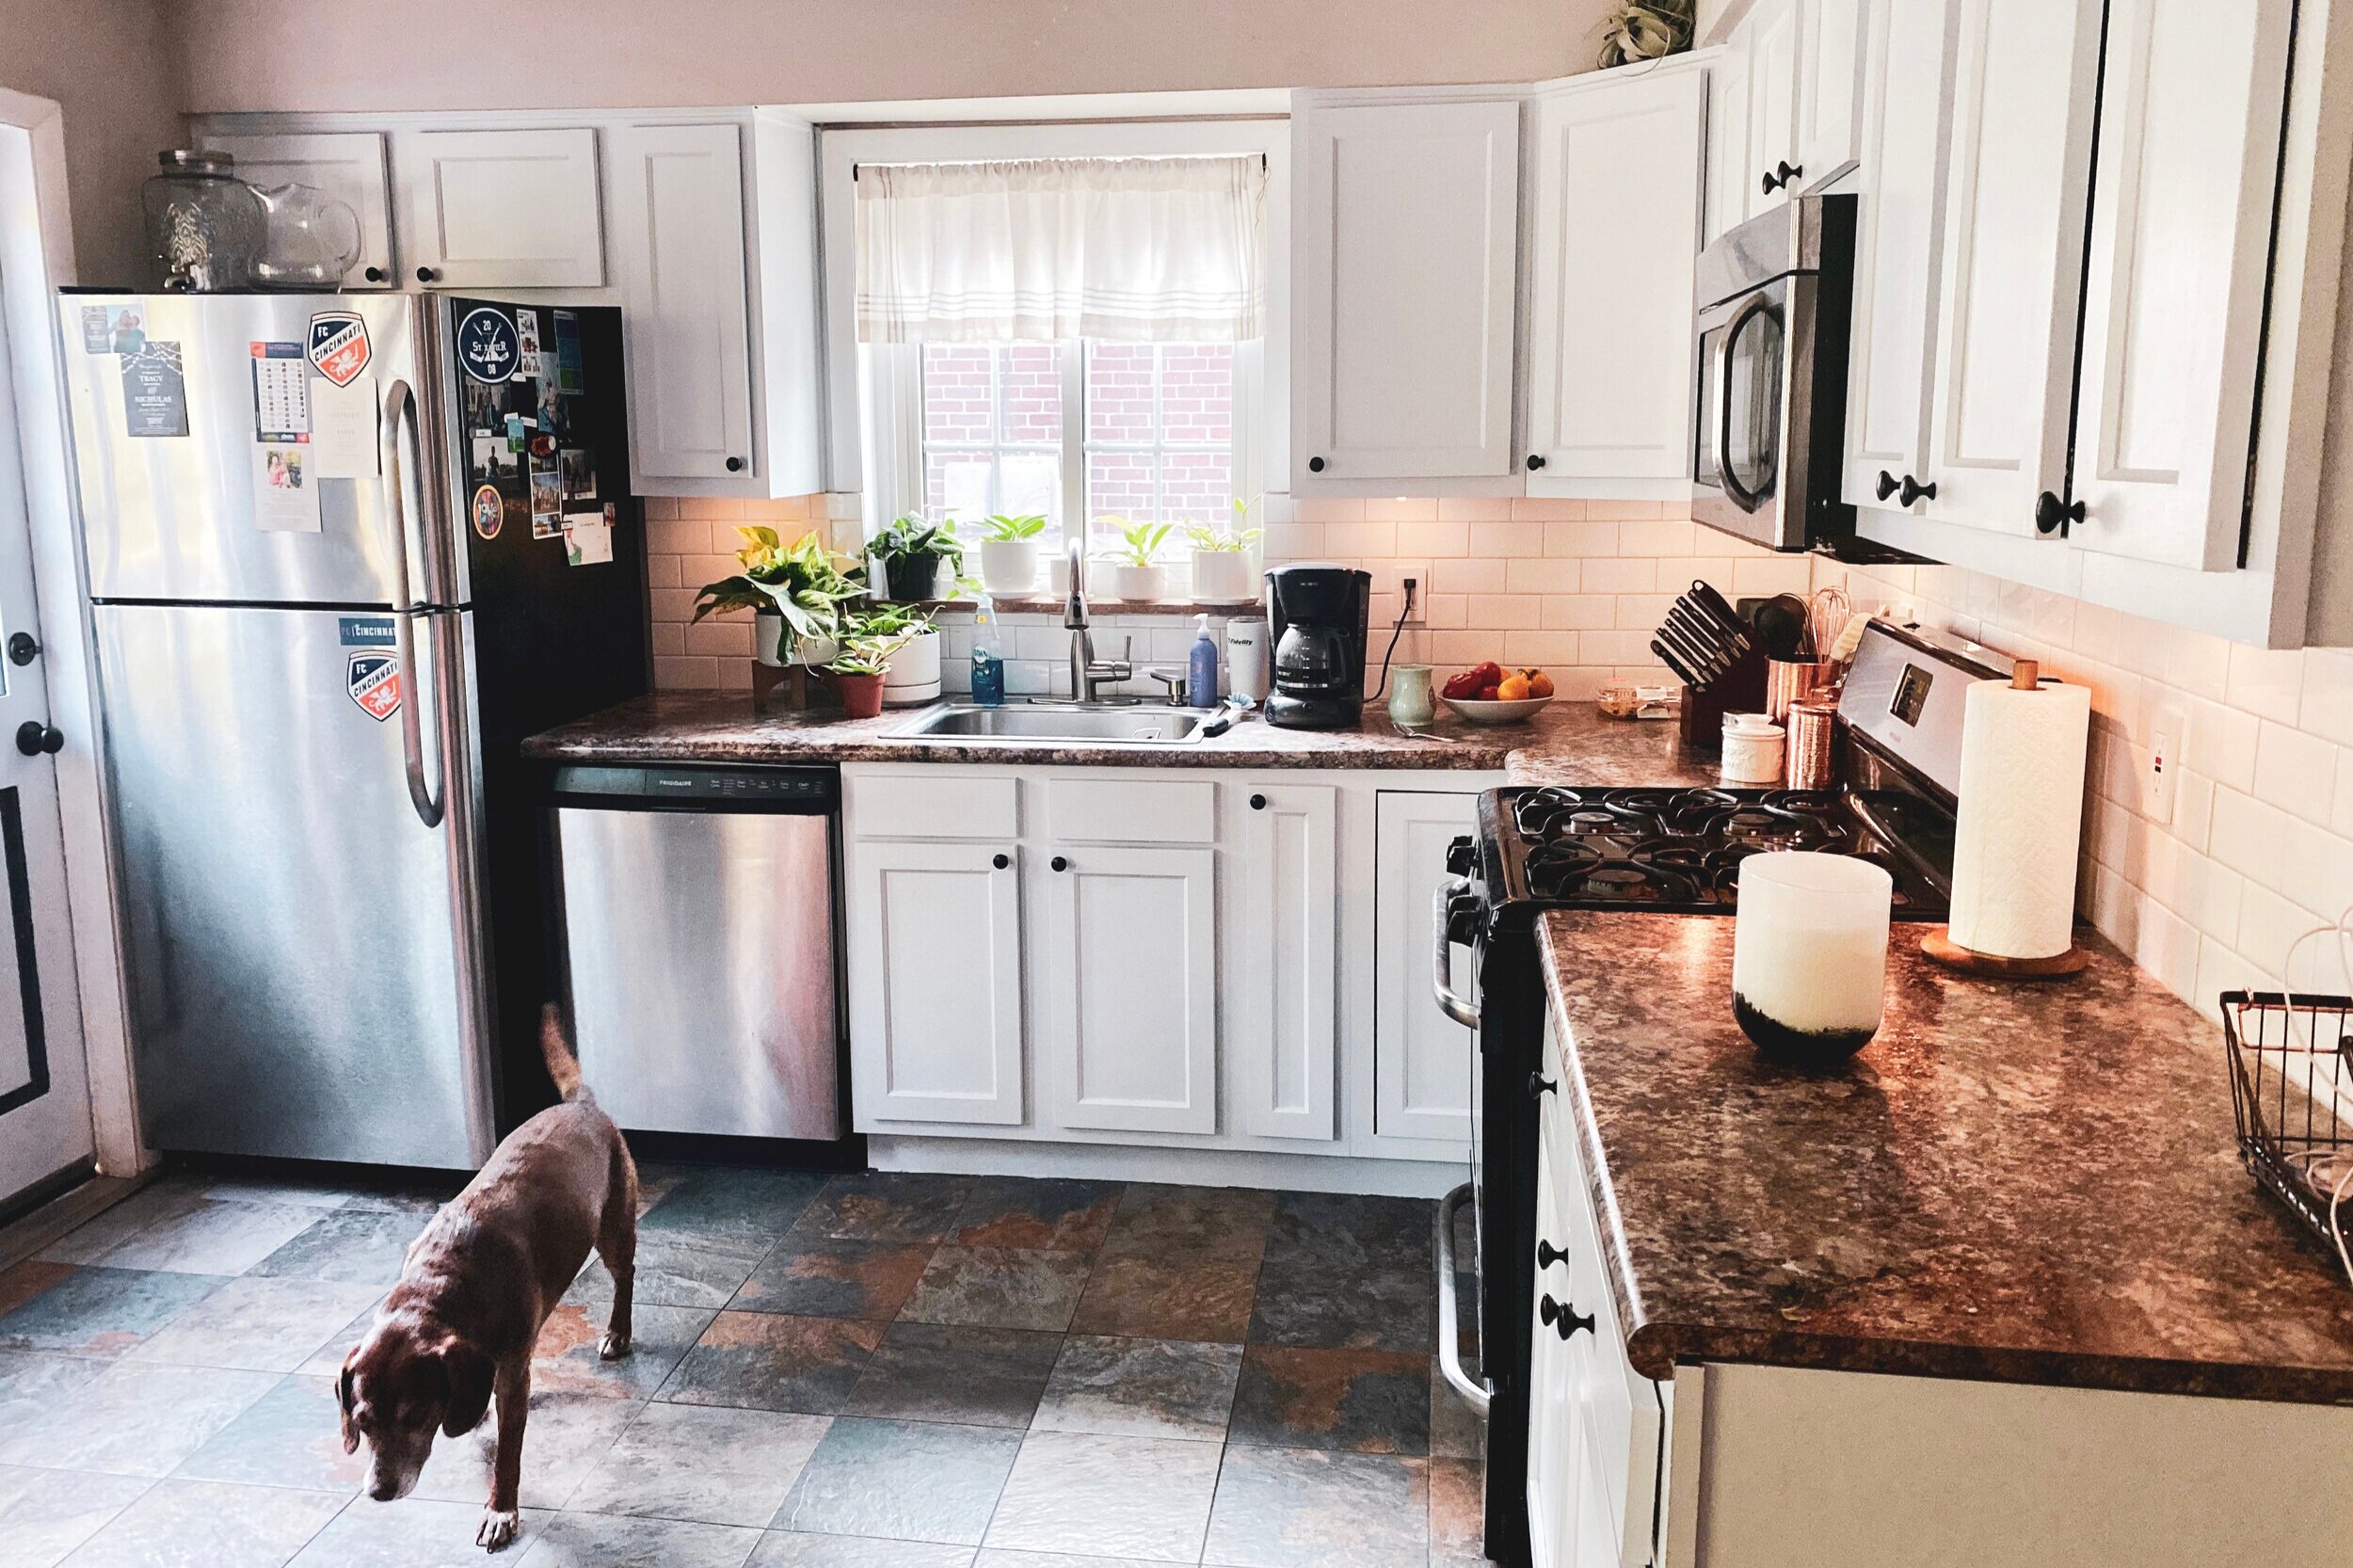
We hung the doors back up on the evening of day three and then the next morning we added hardware and called them finished!

The kitchen had a long way to go at this stage, but it was already 10x brighter than it was before.
The white cabinets alone added so much light to the kitchen that it looked like a brand-new space. I had more plans and improvements in mind, but we enjoyed the brighter kitchen for a couple of days before tackling the next task — the backsplash.
Stay tuned for an upcoming blog detailing how we installed our own white subway tile backsplash!